The following tutorial is a simple guide to show you how to use the filezilla to upload file to your amazon EC2.
Requirement
- Obtain your own .pem file
- Known your Ec2 ip address
Step 1: Download Filezilla
Filezilla client can be download from this website.
Step 2: Connect to Ec2 Instance

1. Double click your filezilla client
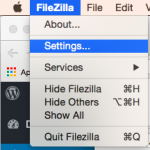
2. From the top left menu Filezilla > Settings…

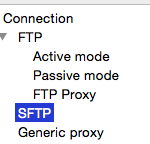
3. From the left panel, select SFTP and click Add keyfile…
4. Browse to your xx.pem file and click ok.
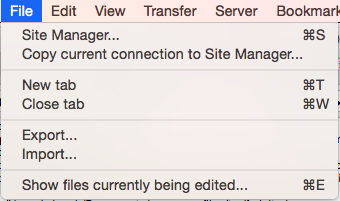
 5. From the top left menu File > Site Manager
6. Click create new site button
7. Enter the Host and Port
8. Select SFTP -SSH File Protocol
9. Logon Type select Interactive
10. Enter user ec2-user and click connect
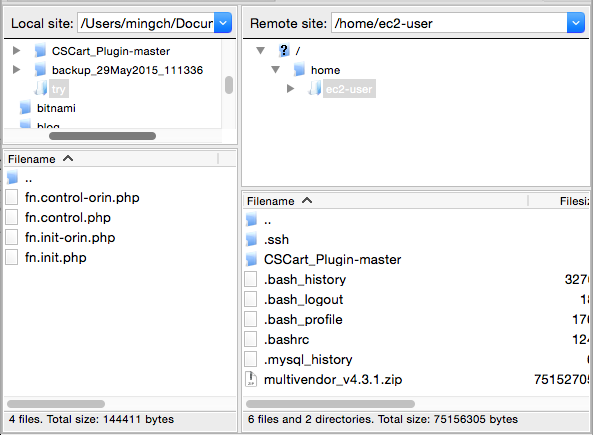
Filezilla UI
Left panel is your local machines, and right panel is your remote machines.

Permission
Since we’re logon as ec2-user, normally we cannot upload files directly to other directories, such as /var/www/html.
So, we upload the files to the ec2-user home directories and then login ssh and use sudo mv command to move the files to the destination.
Assume you upload example.php file in your ec2-user home directory now.
Terminal
Open your terminal and CD command to your xx.pem files and type the following command to connect your remote ec2 instance.
ssh -i xx.pem ec2-user@111.XX.XX.113
Once you had connected your remote, you should see something like below:
       __|  __|_  )
       _|  (     /   Amazon Linux AMI
      ___|\___|___|

https://aws.amazon.com/amazon-linux-ami/2015.03-release-notes/
-bash: warning: setlocale: LC_CTYPE: cannot change locale (UTF-8): No such file or directory
[ec2-user@ip-10-0-0-208 ~]$
Move file
Let’s say you want to move file to /var/www/html
[ec2-user@ip-10-0-0-208 ~]$ sudo mv example.php /var/www/html
That is!